Adding A Photo to a Forum Post or Reply
Size limitations apply. If your photo is over 100,000 bytes and/or 800 pixels or more wide it must be made smaller. You will need to do the reduction as your first step in this process. Use your photo editing software or web sites such as http://tinypic.com/ to accomplish the reduction.
If your photo is not online but you do have it in a file in your computer you will need to find a storage site for your photo. There are many to choose from, Picasa, Photobucket, Smugmug and more. NO matter where you store your photos online you must know how to retrieve the URL address.
The following directions work if you are replying to a post or are the original poster and want to insert a photo.
You will find yourself at this screen:
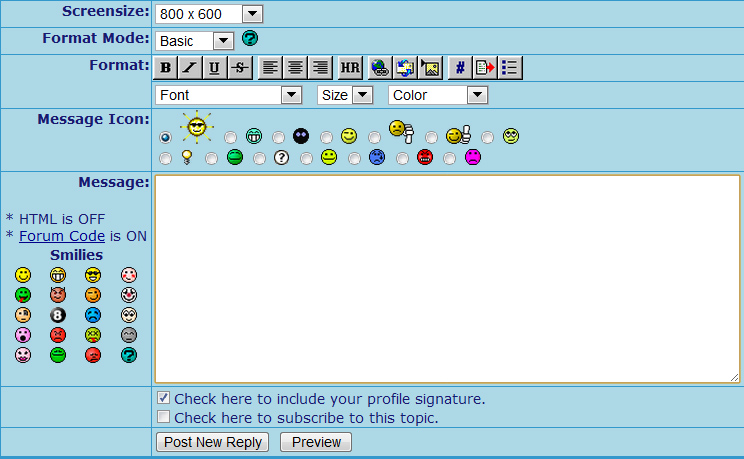
Type in your comments. When you are ready to insert your photo hover over the "Format Mode: Basic" and you will see this:
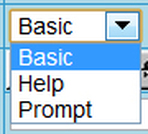
You want to click on Prompt.
Next, go to this icon (4th from the right in the Format row). If you hover over it, it will say, “Insert Image”.
Next, go to this icon (4th from the right in the Format row). If you hover over it, it will say, “Insert Image”.

Click on that icon and another window will open. You will insert the URL address of your photo stored online in that new window.
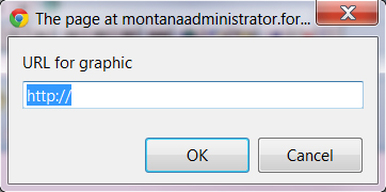
Click OK. Now, preview your post, how does it look?? If all is well, then, post your comments and your photo will appear inside your post or your reply to a post.
Adding A Photo To Your Signature
This is how you add a photo to your Signature line here at the MOC.
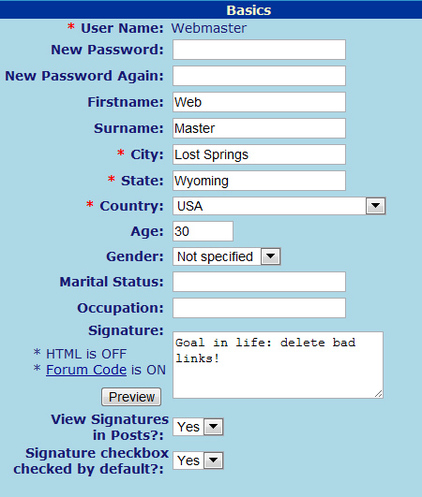
Sign into your Profile.
Go to the area, in the right column, that says, Signature. You will be using some HTML here. Don’t panic, if it does not show correctly, just change it until it does!
The photo you want to use must already be online. Go find it and copy the URL.
Paste the URL address between [IMG] [/IMG] brackets.
Then you will need to copy and paste the entire thing into the Signature block. (Copy/paste works well here, attempting to type in that URL tends to result in errors.)
In the following example, this huge long stream of letters and numbers is a pretend URL:
http://xyzplace/photos/images/5880.jpg
And, here it is placed within the [IMG] and [/IMG]. **Note, no spaces!**
[IMG]http://xyzplace/photos/images/5880.jpg[/IMG]
After you have edited your signature line, you can do a "Preview" of how it looks. The "Preview" button is just above "View Signatures in Posts?" Click it, check out how your new signature line appears. If you like what you see then:
Save by clicking the SUBMIT button. (see very bottom of the profile page).
There you have it, a signature line with a photo.
